Hierarchical Levels Of Detail or HLOD is a method of combining multiple static meshes into a larger, simpler proxy mesh that will display at distances far away from the camera. It will then transition back to the original separate higher detail meshes at close distances.
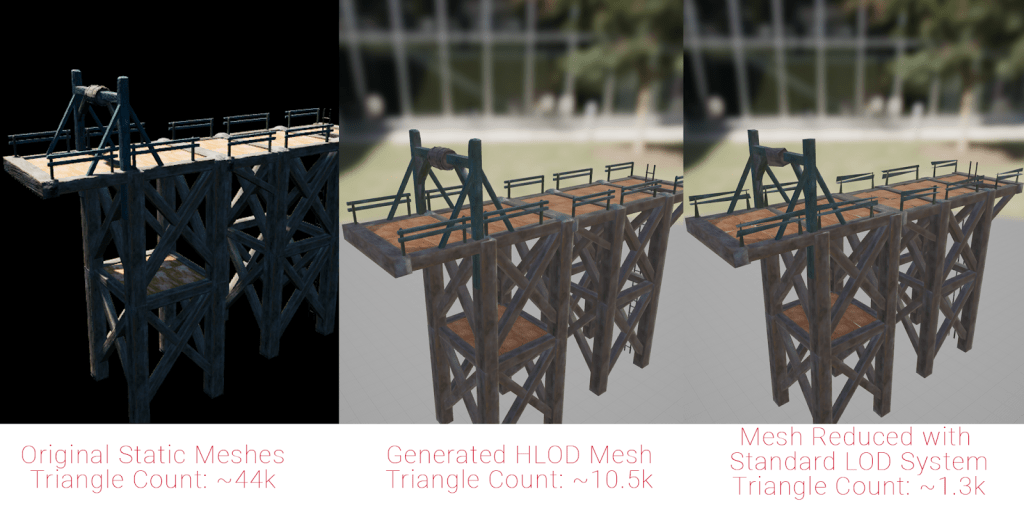
These merged Proxy meshes are much less resource intensive to render and can drastically reduce draw calls and triangle counts for scenes when there are a lot of different objects on the screen at once.
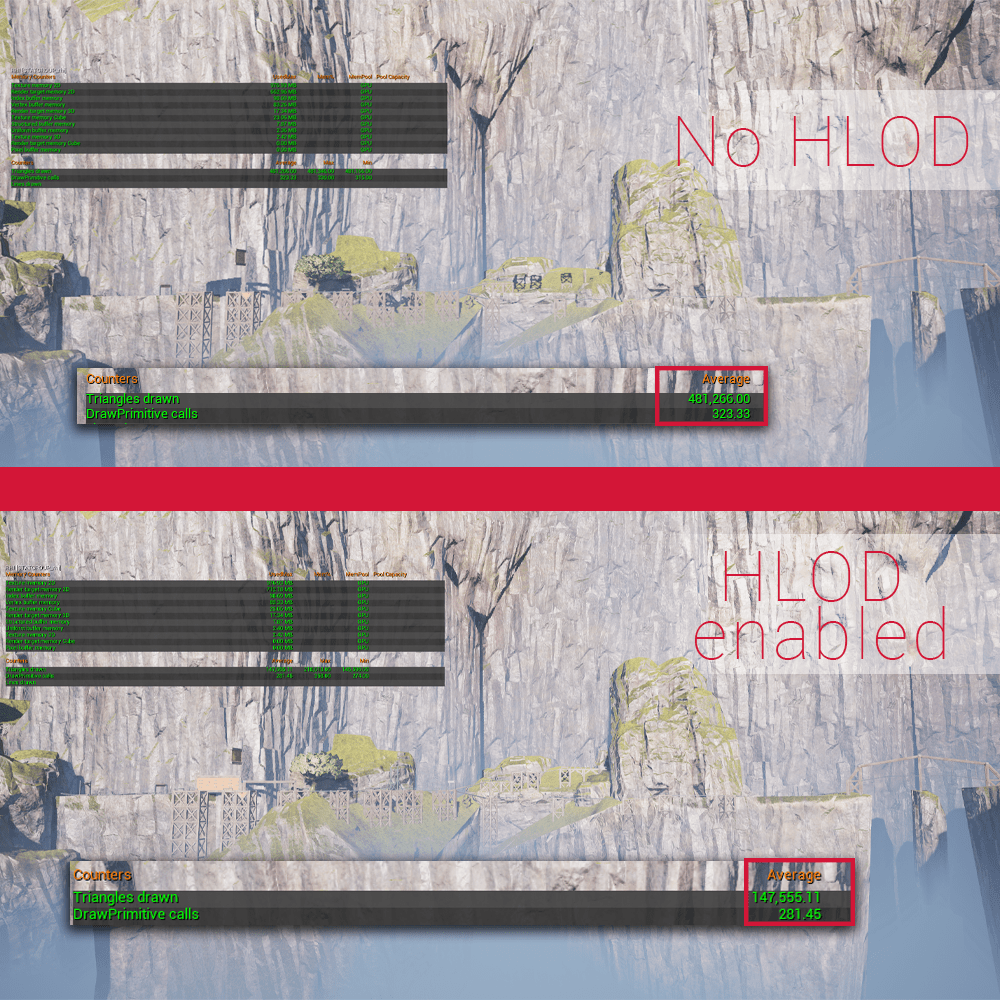
You can see in the above example how enabling the HLOD system reduces triangles and draw calls without having to cull any objects from view. The HLOD version actually has more detail in this example as meshes are distance culled without the HLOD enabled.
The HLOD system works by assigning static meshes to groups called clusters and then building a proxy mesh for each of these clusters. These proxy meshes will then be rendered instead of the original group of static meshes at distances far from the camera.
Setting up HLOD for your level
HLOD must be enabled in the world settings of your level.

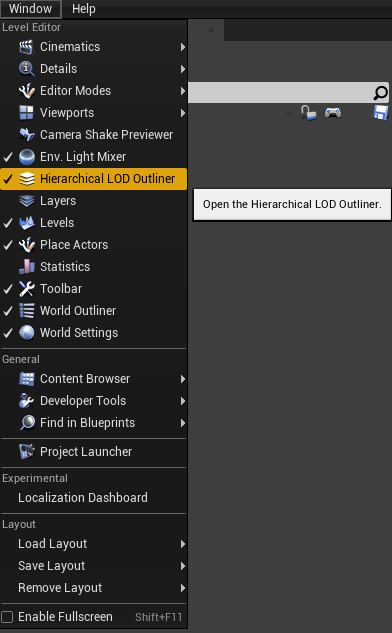
To set it up after enabling this, you’ll need to access the HLOD Outliner Window. You can access this from ‘Window>Hierarchical LOD Outliner’.
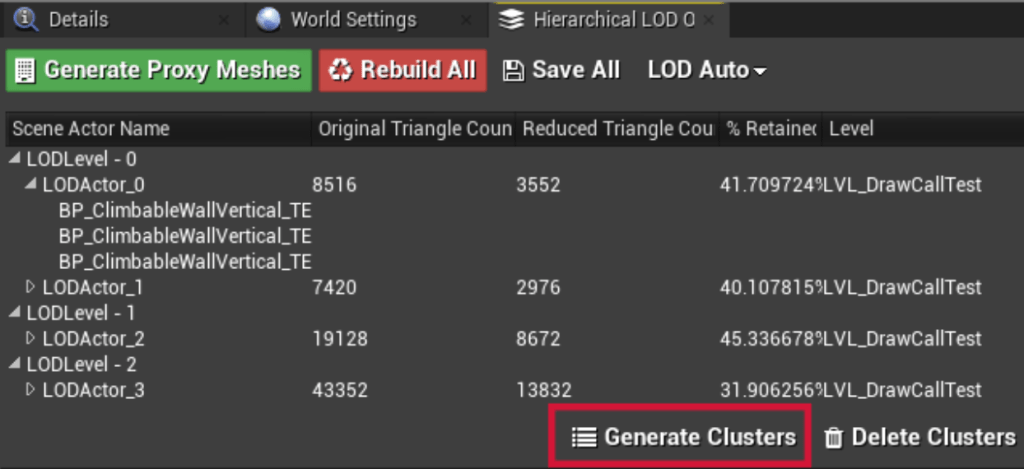
The HLOD Outliner
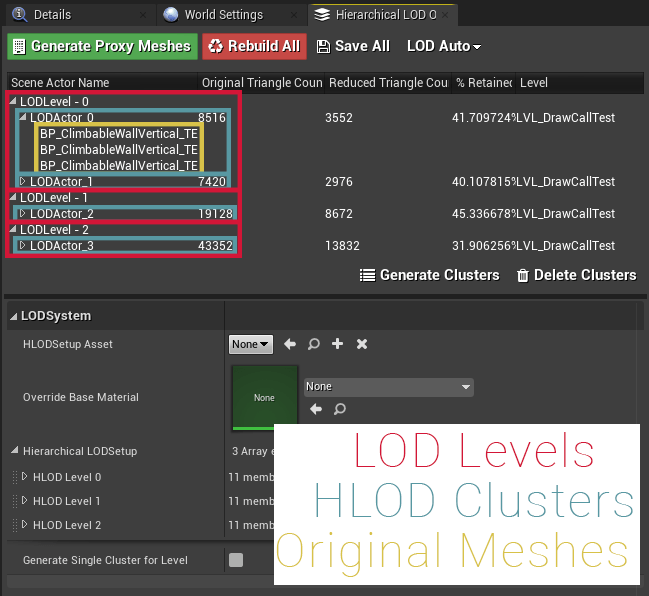
The HLOD Outliner shows the HLOD settings and controls for your level.
It shows the LOD levels, which let you have multiple sets of clusters with different settings. For example LOD 0 has small clusters with less simplified proxy meshes and LOD2 will have large clusters that will have largely reduced triangle counts. Each level’s settings can be tweaked individually and will affect all clusters within that LOD level. You can manually decide how many LOD levels to include for you HLOD system. It also shows the HLOD Clusters and all of the Original Meshes within each cluster.
Generating Clusters
There are three main ways to generate HLOD clusters:
Manually:
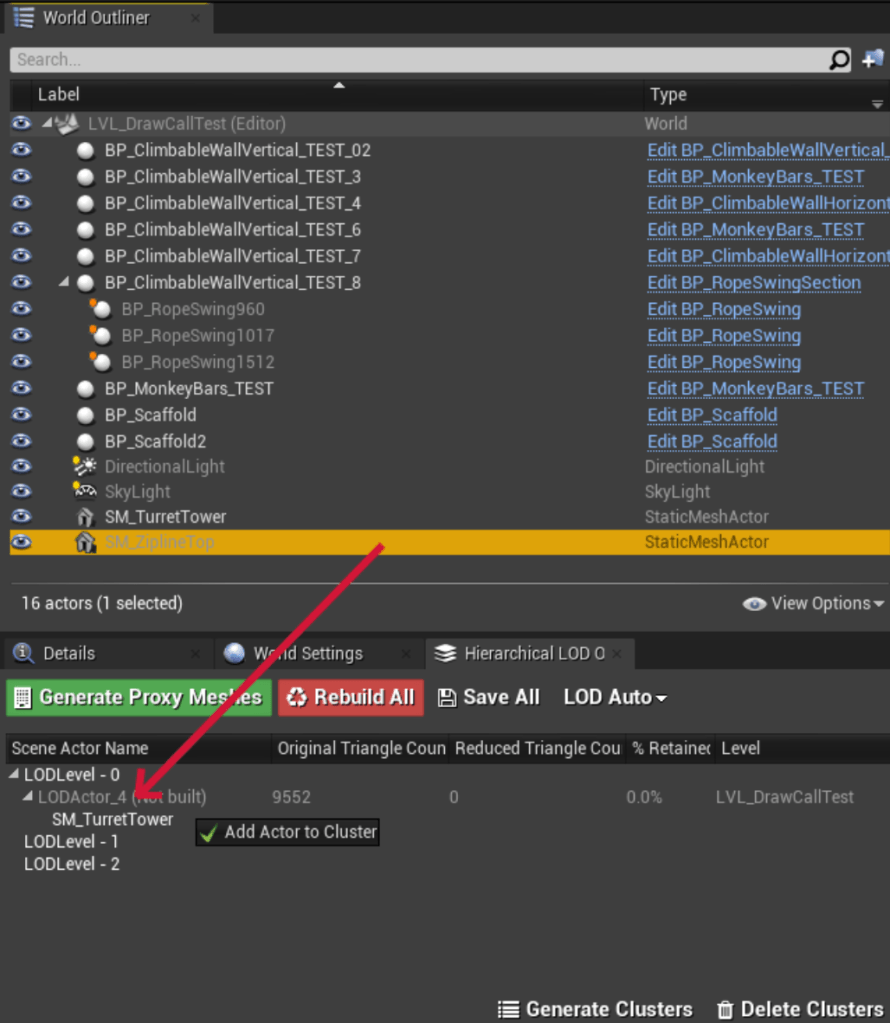
You can drag objects directly from the world outliner into the desired LOD level to create a cluster and then drag other objects into that cluster to add them to it. Be warned – clicking ‘generate clusters’ will override any manual clustering you’ve already done.
Automatically:
To automatically generate clusters just click ‘generate clusters’ in the outliner. This will generate clusters according to the cluster generation settings for each LOD which can be acessed under ‘LODSystem>Hierarchical LODSetup>HLOD Level x>Cluster Generation Settings’.
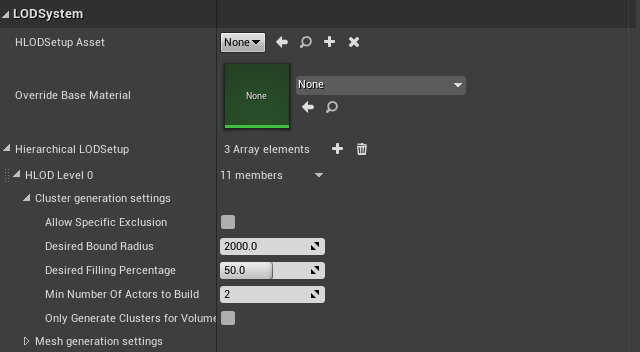
Here you can dictate the average size of clusters at this LOD level, how much of the cluster to try and fill with meshes and the minimum number of actors to build a cluster from.
Semi-Automatically:
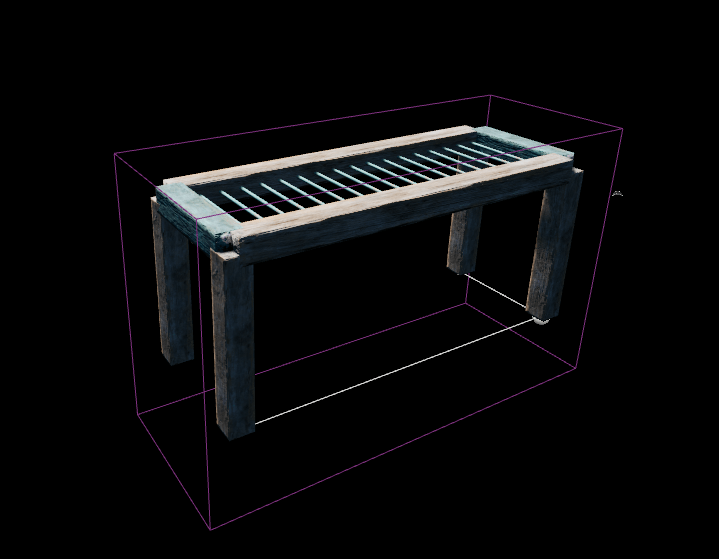
It is possible to refine the generation process to be more specific by using HierarchicalLODVolumes. These are volumes that tell the generation process to bundle all the meshes enclosed by the volume into one cluster. It can either be manually placed and resized into your scene or you can place one around an existing HLOD cluster.

This can be a method to retain manual cluster control over certain areas while using automatic cluster generation for the rest of your scene. You can exclude certain HLOD levels from the volume’s detail panels to make sure it is used for the specific level you need.

Generating Proxy Meshes
Once the clusters are set up for your scene, you can start generating the proxy meshes by clicking ‘Generate Proxy Meshes’.

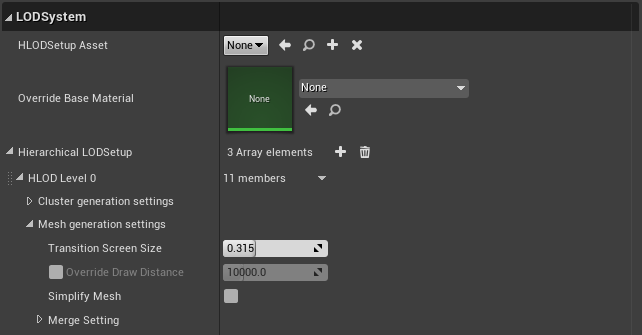
You can tweak the mesh generation settings for each HLOD level in ‘LODSystem>Hierarchical LODSetup>HLOD Level x >Mesh Generation Settings’. Here you can set the draw distance and decide whether or not to simplify the mesh.
After generating the proxy meshes, each one can be manually tweaked in the same way as a normal static mesh, including further reducing triangles and setting up LODs for each mesh.
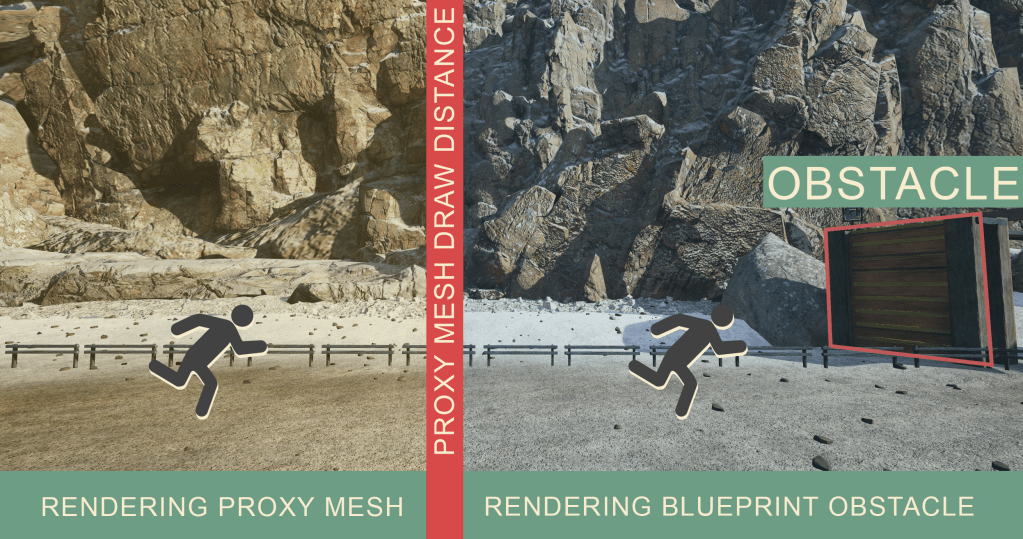
Close up HLODs For Reducing Draw Calls On Blueprint Objects
The performance of VR games is often bottlenecked by the number of draw calls and HLOD proxy meshes are an effective way of reducing this number. Player interactable blueprint objects that have more draw calls than a standard static mesh can get very expensive when there are many of them on the screen at once. This is a method to minimize the effect of this by replacing these blueprint objects with HLOD proxy meshes until the player is close enough to be able to interact with them, at which point the proxy mesh will be swapped out for the blueprint object.
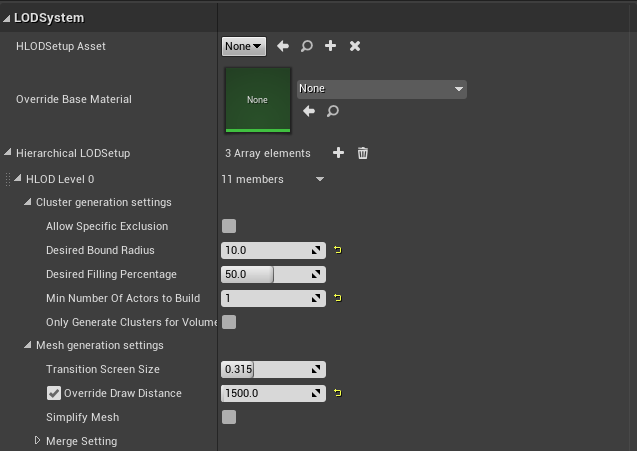
Set up an LOD0 level in the HLOD Outliner. Set ‘Desired Bound Radius’ to the minimum value, ‘Min Number Of Actors to Build’ to 1 and the ‘Override Draw Distance’ to an appropriate distance to swap between Proxy Mesh and Blueprint Actor. These settings will stop the automatic cluster generation process from adding any meshes to this LOD level except for those within HierarchicalLODVolumes. The next step is to build HierarchicalLODVolumes around each of the blueprint actors that you’d like to be affected by this system.
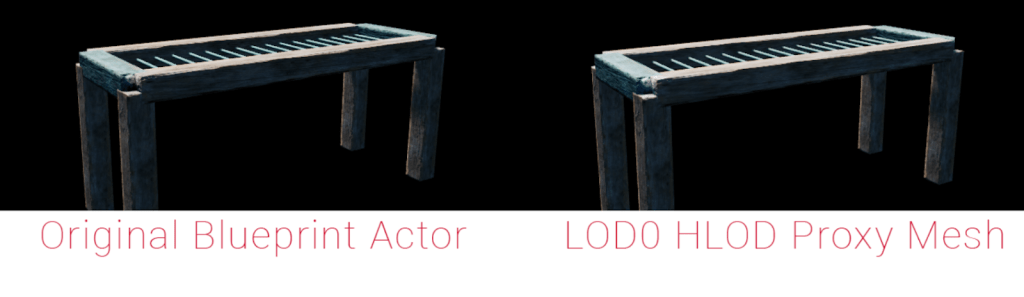
After these clusters are set up, you can create any extra HLOD levels on top of this level with normal settings to use the standard HLOD system as well. Once everything is set up, hit ‘Generate Clusters’. The LOD0 Proxy Meshes look almost indentical to the blueprint actor but with far fewer draw calls.
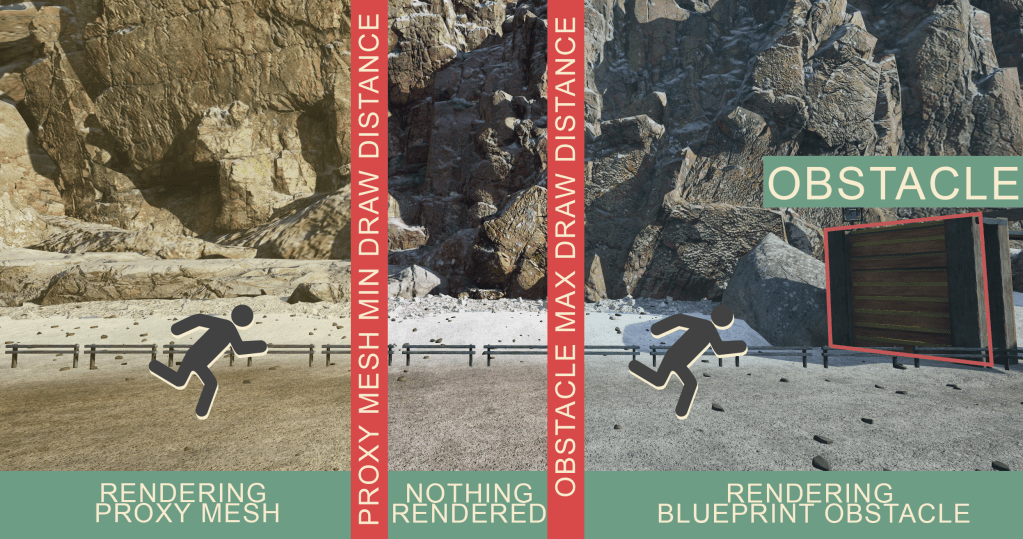
Now you will need to tweak the max draw distances of the blueprints components. This value defines the maximum distance at which the component will be rendered.

You will need to tweak the numbers to make sure that the max draw distance of the blueprint and the minimum draw distance of the proxy mesh overlap by a small margin – otherwise there will be a small distance range from the obstacle where nothing will be rendered.
This generally requires some tweaking on a per-object basis, as the generated HLOD may not share the same origin as the original obstacle. For example, if you’ve set the ‘Override Draw Distance’ in your HLOD LOD0 mesh generation settings to 1000, a max draw distance of 1100 on the blueprint component may not provide sufficient overlap for every obstacle in your level. Tweak this value on each obstacle to see what works correctly.

Leave a comment