This will be a quick and dirty way to do this integration, so to keep everything clean from the main project:
Go to Epic Marketplace and add “Advanced Locomotion System v4” to your library. Then create a project with it.
After the initial setup migrate or import your CC3 char onto the project. The editor will likely generate a skeleton to the CC3 character.
1 – Retargeting
Prepare both ALS and CC3 skeletons for retargeting, go to retarget manager, set both to Humanoid Rig.
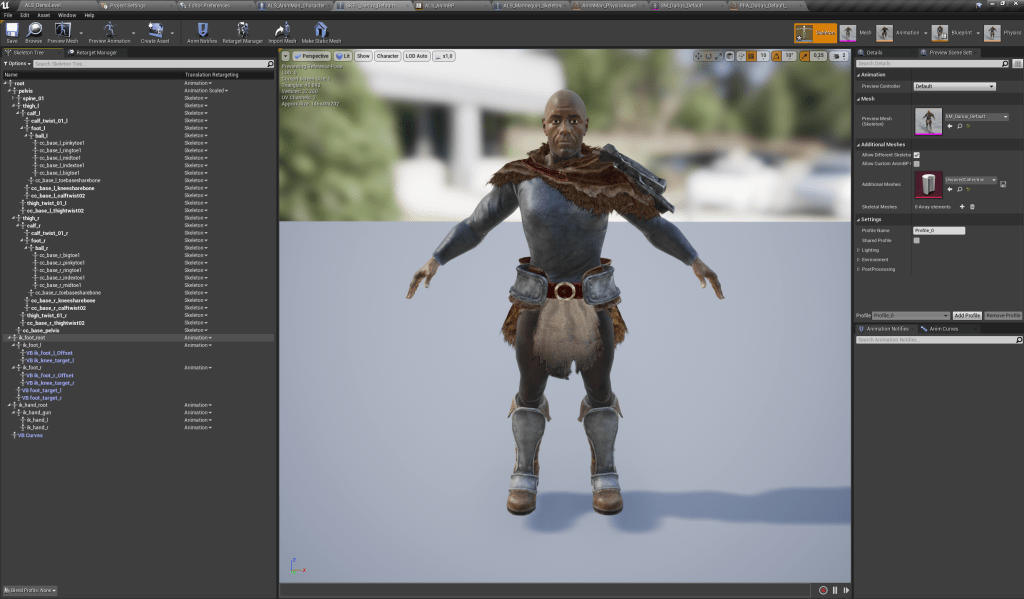
On CC3 character: root bone retarget option is “Animation”, pelvis is “Animation Scaled”, all IK bones will also be set to “Animation”.
Go to the ALS mannequin skeleton and right click, then select “Retarget to another skeleton”.
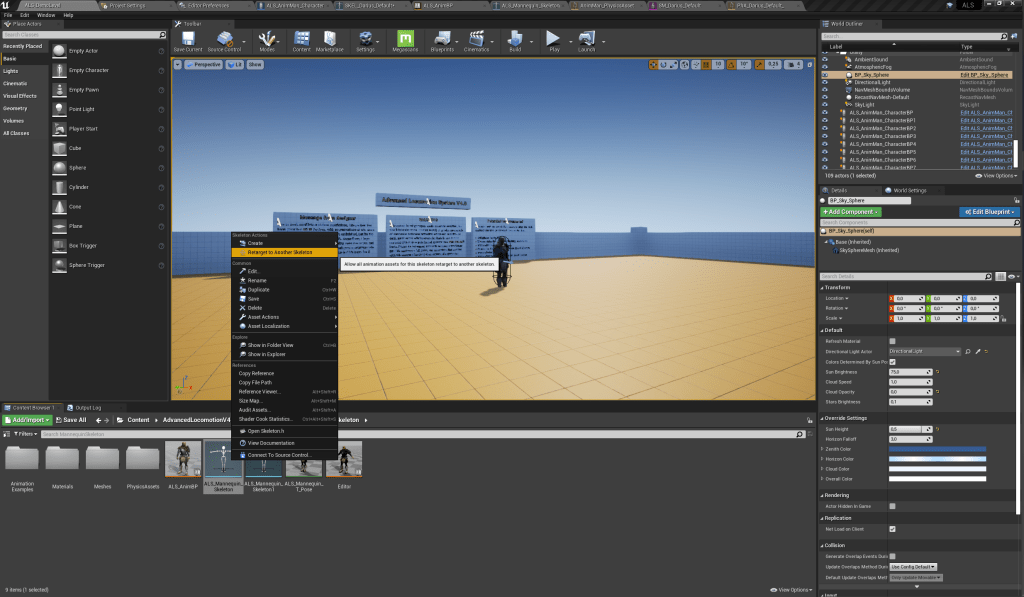
This will retarget ALL the animation assets that are referencing that skeleton. Things to note:
- It will keep the file structure as it was since is is NOT duplicating the assets and then retarget.
- A major CON is that it won’t rename the assets so that needs to be done afterwards.
- A major PLUS would be that it will then retain any reference to the current animation assets.
2 – Adding Virtual Bones to the skeleton.
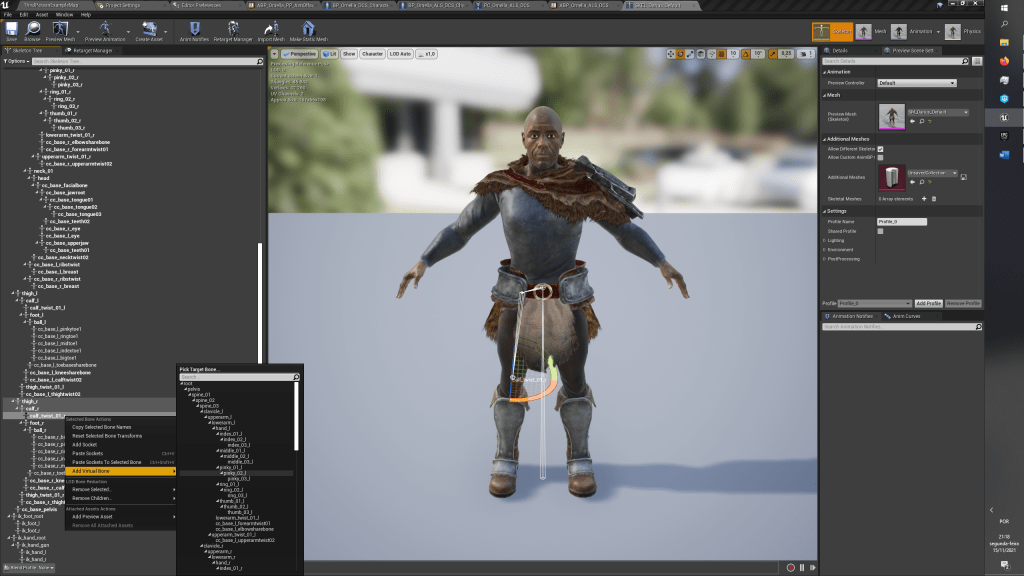
Back to the CC3 skeleton we need to add the Virtual Bones that ALS uses for IK.
To add them you need to go to the skeleton asset, right click on a bone (this will be the SOURCE) and choose another bones (this is the TARGET). Afterwards you can rename the bone. NOTE: the VB prefix can’t be removed.
The following table gives all the needed virtual bones together with the correct sources and targets.
| SOURCE | TARGET | NAME |
| hand_l | ik_hand_gun | LHS_ik_hand_gun |
| LHS_ik_hand_gun | ik_hand_r | LHS_ik_hand_r |
| hand_r | ik_hand_gun | RHS_ik_hand_gun |
| RHS_ik_hand_gun | ik_hand_l | RHS_ik_hand_l |
| ik_foot_l | ik_foot_l | ik_foot_l_Offset |
| ik_foot_l | calf_l | ik_knee_target_l |
| ik_foot_root | ik_foot_l | foot_target_l |
| ik_foot_r | ik_foot_r | ik_foot_r_Offset |
| ik_foot_r | calf_r | ik_knee_target_r |
| ik_foot_root | ik_foot_r | foot_target_r |
| root | root | Curves |
Also copy the head sockets that are placed on the ALS skeleton and paste them on the CC3 skeleton. They are attached to the “head” bone.
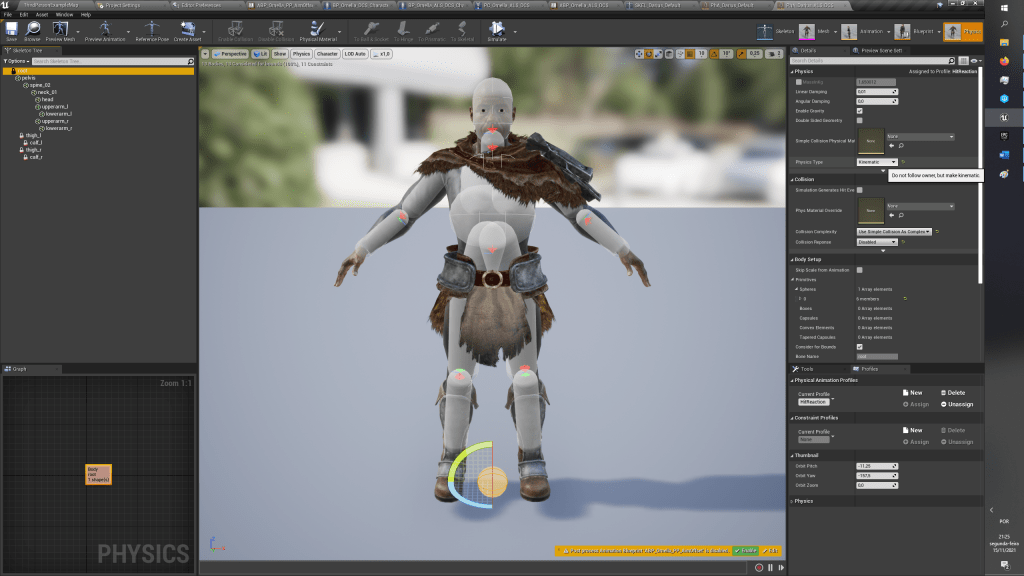
3 – Setting up the Ragdoll/Physical Asset
The auto generated physical asset from the editor might not be well done for the character. So a quick way to have another is to take advantage of the ALS one. We can always adjust or change it again at a later date. Rename the physical asset.
Copy the ALS physical asset and move the copy to the CC3 folder. Open the CC3 character skeletal mesh and on the Physics and Lighting entries place the copied Physical asset.
If you don’t want to copy the physical asset but use another you already have you need to add one extra physical body (if not existing) for it to work with the ALS ragdoll system.
On the physical asset go to the skeleton tree, click “Options”, and select “Show All Bones”. Right click on the root bone and select “Add shape”.
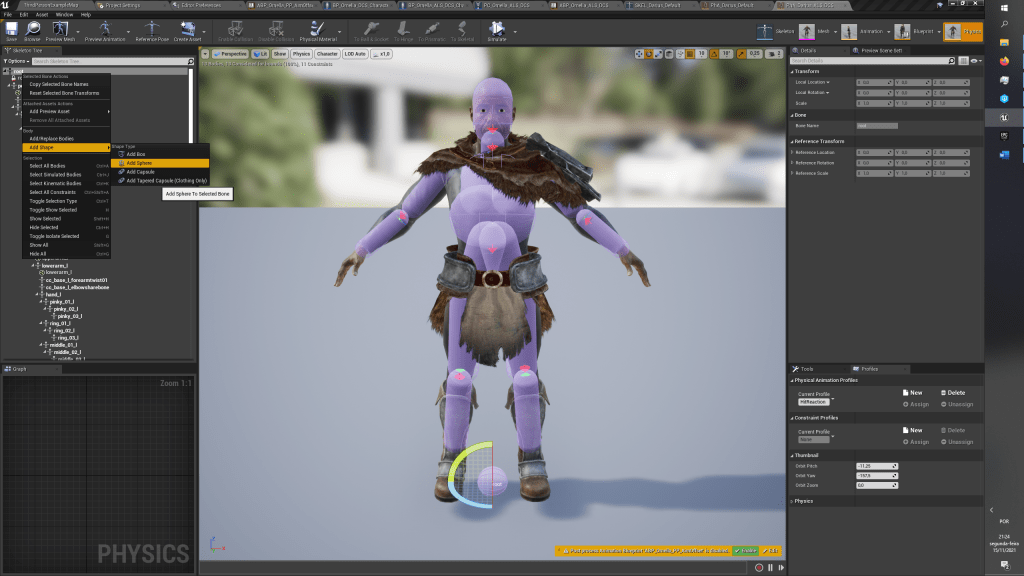
After that just make the created body to be kinematic and disable its collision. So “Physics Type” set to “Kinematic” and “Collision Response” set to “Disabled”.
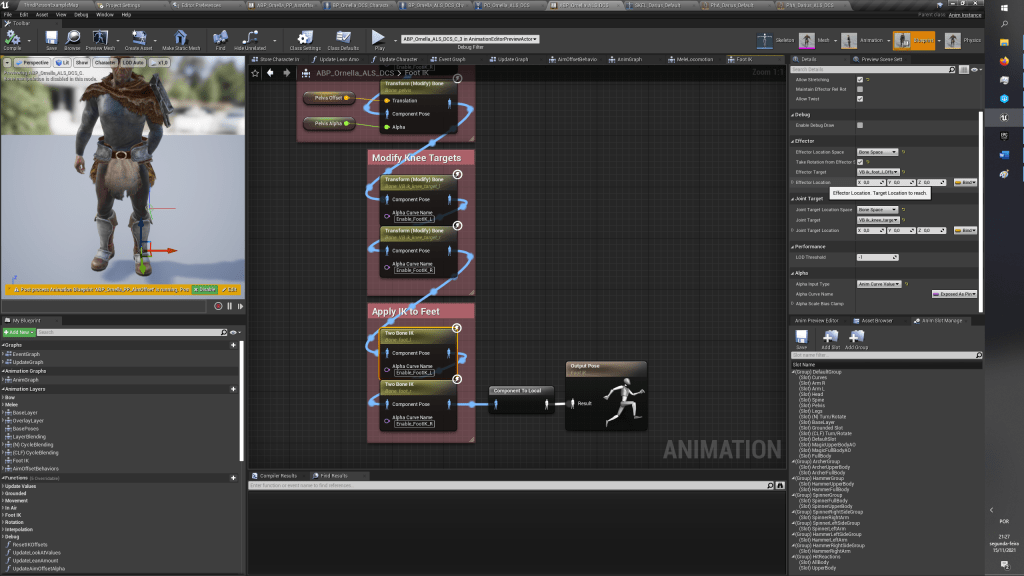
4 – Animation Blueprint adjustments
If you attempt to play you may notice that the face appears to be melted when the heads does sweep motions. The feet might also be floating a bit. For this we need to apply some adjustments on the animation blueprint. First, the feet.
Go to the “Foot IK” animation layer. On the bottom there’s a box named “Apply IK to Feet”. You need to adjust the “Effector Location”. Both adjustments should be on the X value. The left side is likely a negative value offset while the right side should be a positive value. For this character in particular +3 and -3 worked best.
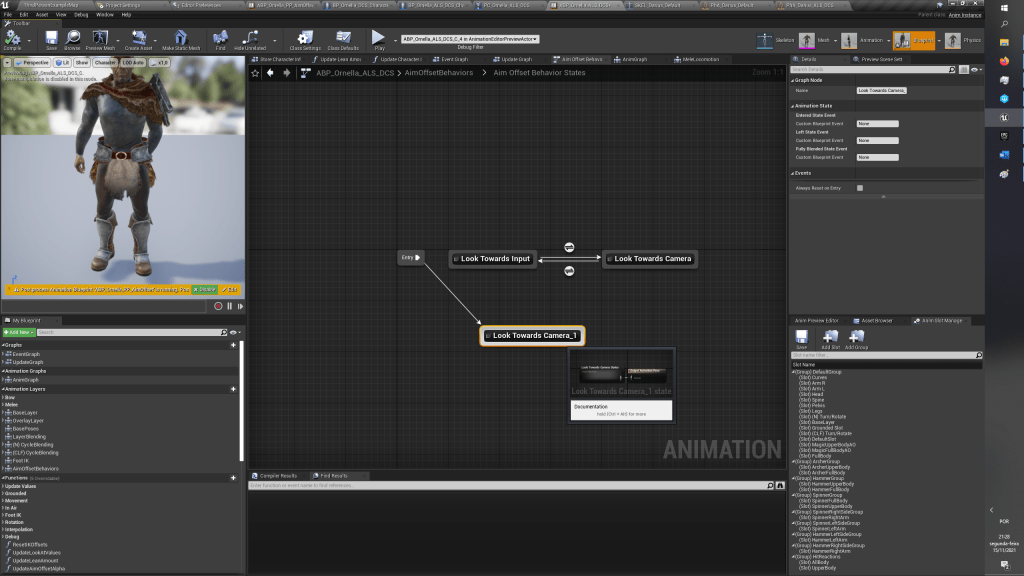
Then it’s just a matter of “fixing” the jawbone. My take on the issue is that CC3 places weights on the facial bones (to enable animation on them) but since our animations do not use them some animation curves might be applying some influence on them. The jaw problem is due to the “cc_base_facialbone” lagging behind the rest of the head when rotating. One fix could be achieved using a Control Rig but there’s another solution which is less complex. The drawback of it? It disables one bit of the animation blueprint.
Search for “AimOffsetBehaviors” open the nested state machine and then just disable the “Look Towards Input” state. You can just duplicate the “Look Towards Camera” state and connect the entry node to this new state.
Now should just be a matter of renaming the animation assets to keep everything tidy. Renaming the assets in bulk while connected to P4V is likely a lengthy process but it assures that no reference gets broken.
If you rename the assets, in bulk, without being connected to P4V I recommend doing it in small batches. Close the project and reopen, see if nothing failed to load and continue like that until finished.
If anything fails to load: rename the culprit asset (or assets) to the previous name, save. Close and reopen. The loading error should be cleared. Rename the assets again and test again just to be sure. And then continue.
5 – ALS and DCS merge
The initial merge following the tutorials leaves the blueprint with a lot of bugs that have been squashed on the meantime.
On my opinion the best course of action to apply a new character to it would be: add the new skeletal mesh. Likely, the engine will assign a new skeleton to it, or even, pick a mannequin skeleton and add the new CC3 bones to it.
I would advise to restore the Mannequin skeleton if the editor alters it, just for precaution.
Then, pick the skeleton that the already existing characters have and assign that skeleton to the new skeletal mesh.
Adjust the retargeting options (rule of thumb: root as Animation, pelvis as animation scaled, the rest as skeleton and IK bones, weapon bones and such as animation also).
The engine will then provide runtime retargeting of the current pose to any skeletal mesh that shares the skeleton.
Issues: if the skeletal meshes have different proportions it will be required to correct it. Likely IK will be necessary .
NOTE: if there are any folders that have the same naming scheme on both projects you may end up overwriting any asset that has the same name.

As per the image above, if I migrate the assets on the left project to the right side project I will be inevitably overwriting the existing files.

Leave a comment