The goal here is to make a pallet stacking system that can gives the users a feeling of weight and makes them think about how boxes should be stacked.
The snap system
The snap system (Modular Snap System Runtime) is straightforward to set up. First you need to go to the static mesh that you would like the snap system to work for and add some sockets to the mesh. Optionally if you only want snapping between specific objects then you can name the sockets so they match with what you want to snap to for example you could have two sockets ‘box_01’ and ‘cylinder_01’ then specify in the snap settings to pay attention to the socket names and these two would no longer snap together.

Next you need to set it up in your VR pawn so that the snaps are triggered when you drop an object that you would like to snap. To do this with the Vive_PawnCharacter we follow off from the TryDropSingle_Client nodes and take the gripped actor and use the snap node.
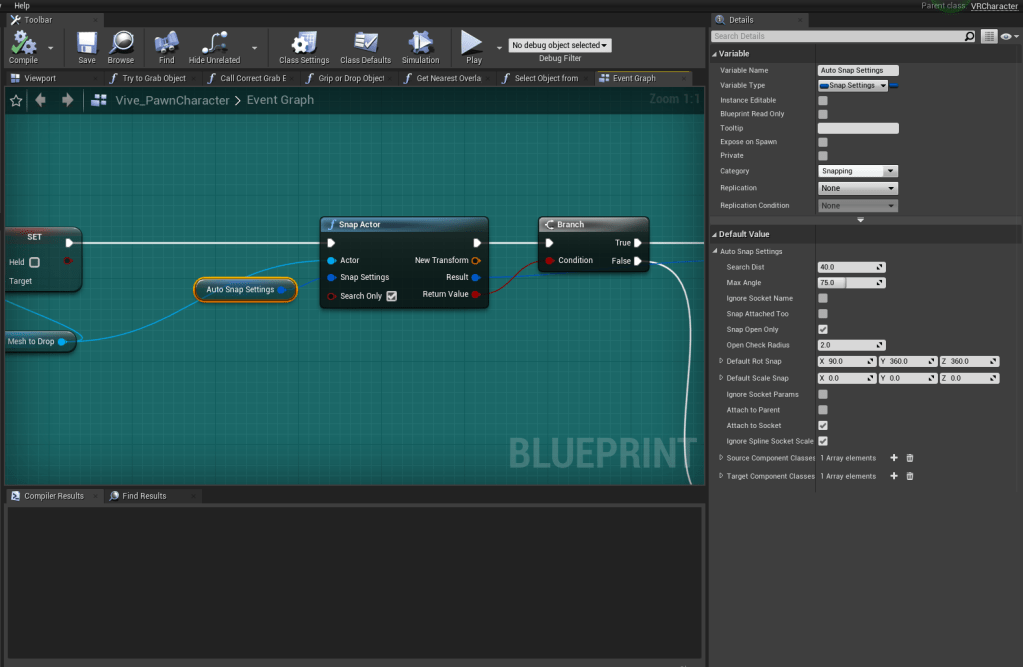
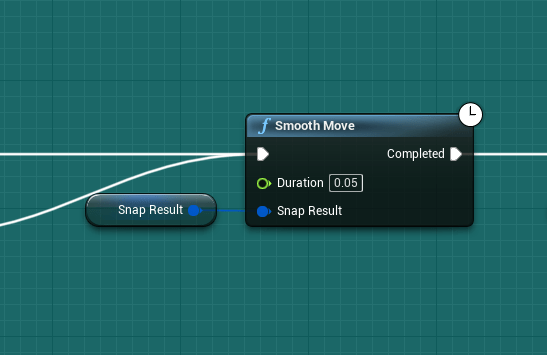
This is then followed by the smooth move node which does as it says and takes the snap info and smoothly transitions the object to it’s new location.
In with the snapping code on the Vive_PawnCharacter is also some functions that are called on the dropped object and it’s new stack parents. The functions update the procedural meshes with the new weights they have above them on the stack which in turn updates the deformation and also updates them to save a reference to their parent. This is also done when the objects are grabbed after the TrytoGrabObject nodes.
There is one problem with the snapping system for this use case and that is a procedural mesh can’t have sockets so I have solved this problem by using a underlying static mesh which deals with the snapping instead of the procedural mesh. Another problem is you can’t update sockets dynamically, which was a problem because I didn’t want the objects to stick to the side of each other. To solve this I have a function called ‘AdjustSnapPoints’ which swaps the underlying mesh as it rotates to make sure that there are only ever sockets on the top and bottom.
The Procedural mesh
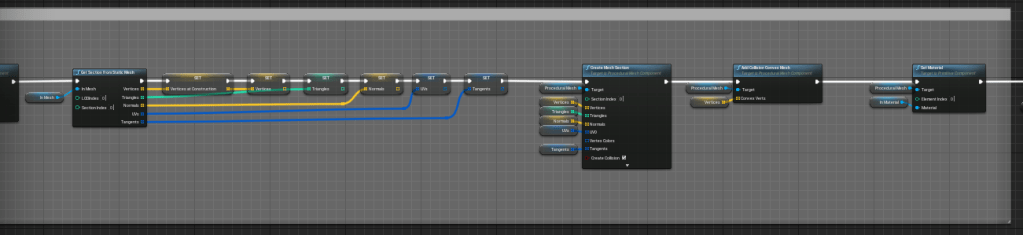
To get the procedural mesh set up you need to first take a static mesh you want to work as the base for the procedural mesh and get the section from the static mesh and use the outputted values to create a new mesh section for the procedural mesh. Then some collision needs to be added using the ‘Add collision convex mesh’ node.
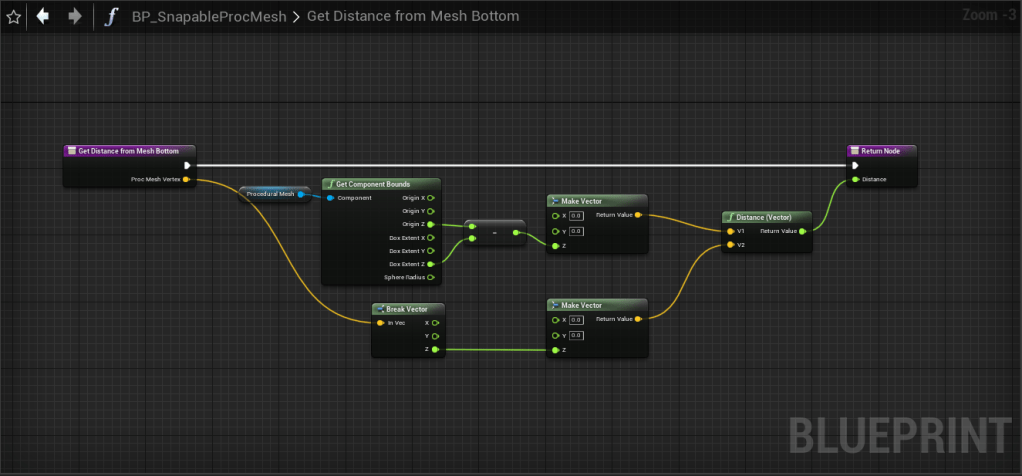
To deform the procedural mesh you need to do 3 things calculate the adjustment for each vertex, move the vertices and then update the procedural mesh. To calculate the vertex adjustments first you need to rotate the vertex to account for any changes in world rotation then get the distance of the vertex from the bottom of the mesh and finally multiply that by a factor of the current mass load on the object. This gives us the base deformation, we then do another step to add the buckling effect.

First I do a check to see if the vertex is on the top or bottom face as we only want this effect to apply to the middle vertices when the deformation is less. If it is we do a simple adjustment based on what we have already calculated and if not we also do the buckling calculations.
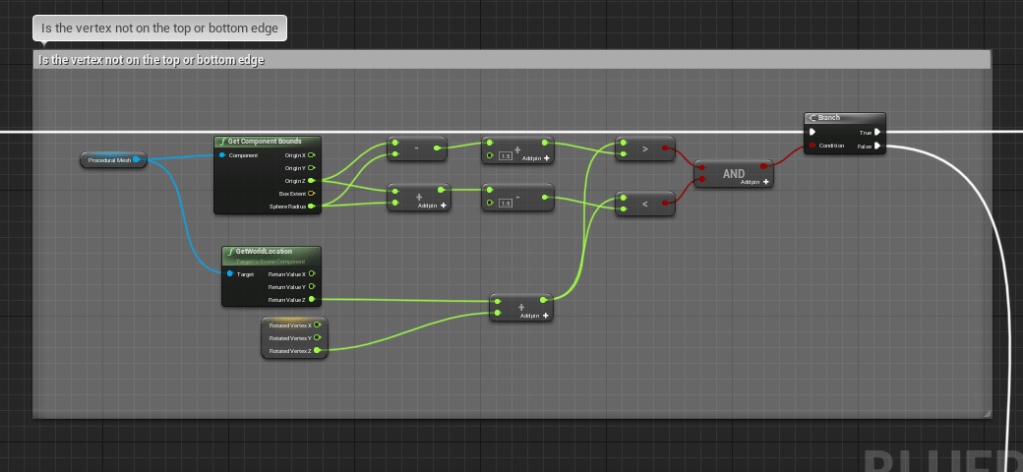
To work out the buckling get the distance of the vertex from the centre point of the mesh using ‘component bounds’ and then put that into a range between 0 and the ‘OutwardsBuckleFactor’ which can be adjusted on each type of object to create different crushing profiles. Then multiply that by the direction of the vertex from the centre of the mesh to get the vertex change.

Finally update the procedural mesh, in the picture below you can see that I have used a timeline to smooth out this process by lerping between the old vertex positions and the new ones. To do the updating use the ‘update mesh section’ node as well as clearing the old collision and rebuilding it. When this is done check to see if the mesh has sbeen crushed and if it has highlight it.
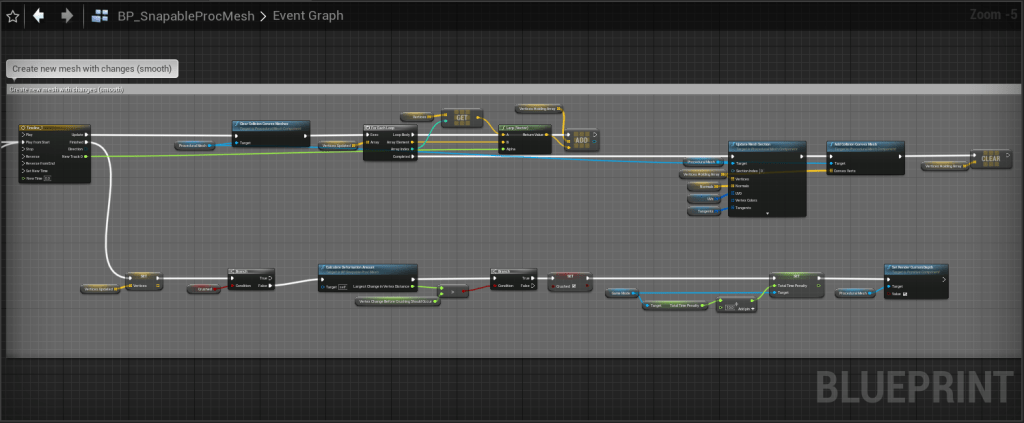
The result of this is that the mesh will deform after a certain amount of weight has been put on top of it as you can see in the video below. There are still some improvements that need to be made to this such as updating the sockets so that they more closely fit the procedural mesh (to stop the meshes from floating).

Leave a comment